 |
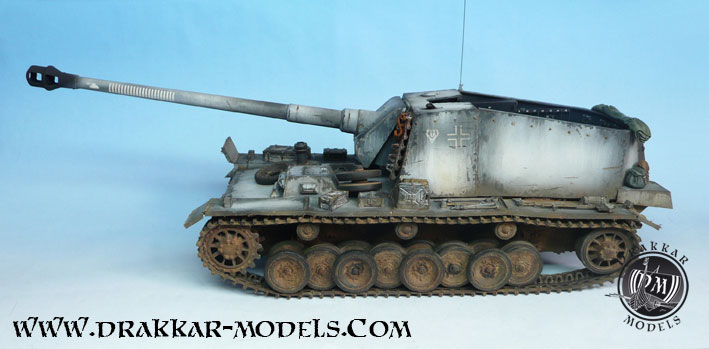
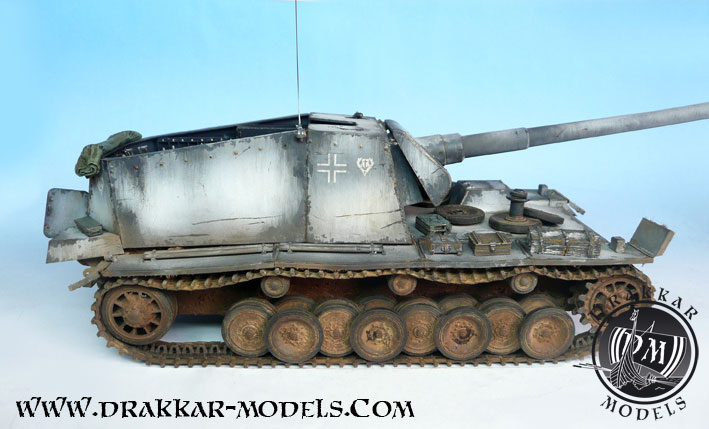
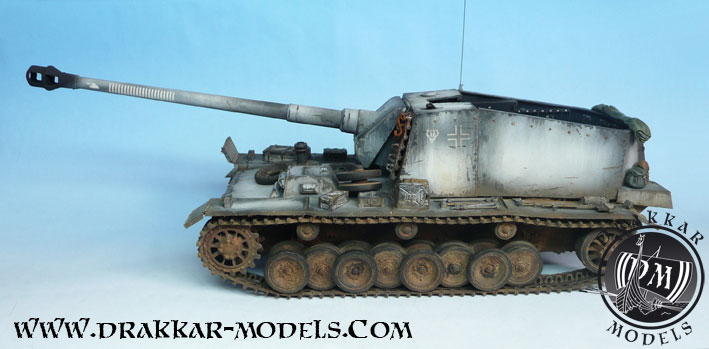
12.8 cm auf Sfl VK3001 Stürer Emil "Moritz" |
1/35 Scale
STURER EMIL: Trumpeter
ACCESSORIES: Aber, Friulmodel, RB Model, Drakkar-Models, Verlinden
Shortly before the beginning of war in 1939, the German firms already working on a medium tank of 30 tons to replace the Panzer III and IV. The project code is VK 3001.
Before Operation Barbarossa, and despite the lack of information on Russian equipment, the armament of the prototype is considered too weak to face the enemy arsenal. The adventure of the VK 3001 stops there. Well, almost ...
Three prototypes are built, and two will be modified to meet the demand for support on the Eastern Front. The chassis will be extended and strengthened, and an extra wheel added in lenght and the superstructures are profoundly modified to accommodate the huge cannon 12.8 cm Pak 40 L/61.
If the engineers give the name of Stürer Emil (Emile the stubborn) to the motor, the crews will soon nicknamed the Panzer : Max and Moritz, in reference to a popular cartoon recounting the adventures of two mischievous kids. Both models will be paid respectively in the 2. Panzer-Division, and schwere.Panzerjäger-Abt 521 on the Eastern Front.
If both of panzers were the opposite of standardization, and their supply shells and spare parts was a real problem, they were nonetheless effective, compared to rings exhibited on their gun, reaching their target until 4500 meters !
The first will be destroyed by battle, while the second will be captured and displayed to the public as a trophy, before ending his days at Kubinka museum in Russia, where he still is today.
Maurice Goes to War
Moritz is my choice, because this is the model that is most often seen on old photographs, in working order with its camouflage of branches and whitewash. Max, when with him, was mostly immortalized on paper, at the factory.
We will have to identify some differences between the two versions, such as the headlights, the absence or not of the radio "cockpit", the tools, etc ...
The Trumpeter kit
Unsurprisingly, the pieces found in the box of the Chinese manufacturer are of high quality and ensure a good result "from the box" or an excellent base to improve the model at its own way.
The pieces fit together without concern and require no comment. That said, the kit is too simplified for the inside of the armored casemate. This will be remedied with Aber etched parts.
I decided to emphasized the contrast inside / outside. Three Aber photoetched kits will be used as ammunition brass, Friul tracks and a turned gun barrel from RB Model.
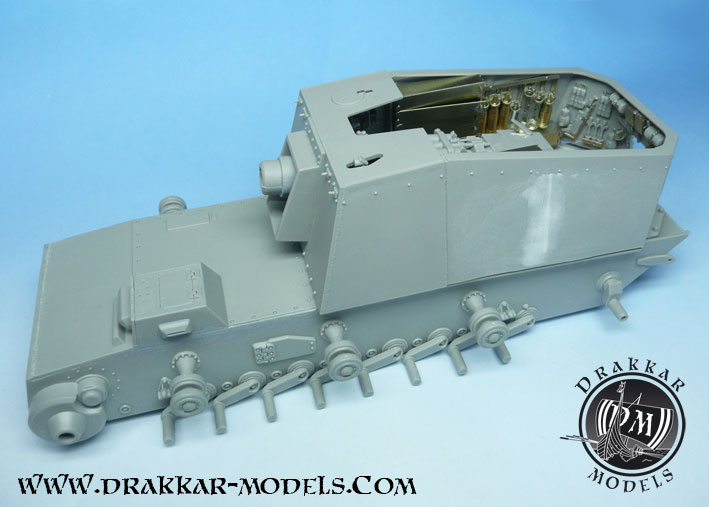
Whether for the assembly phase or paint, we begin with the casemate, the reverse would be no judicious !
The fighting compartment
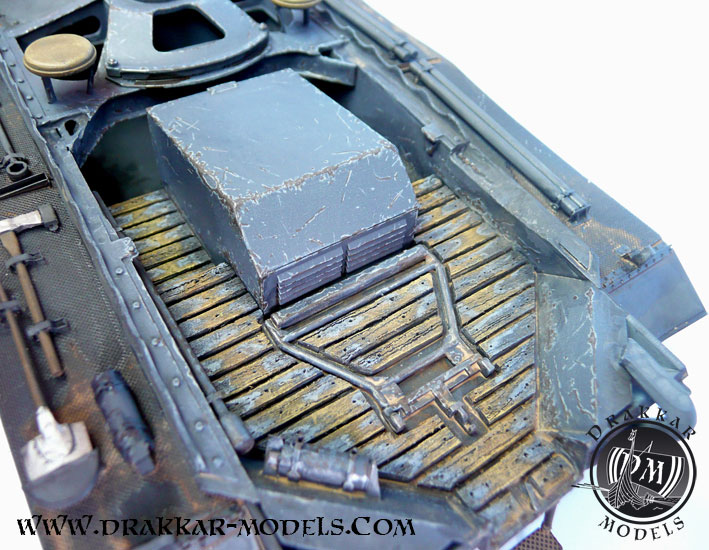
We begin by detailing the floor with slats of a fine sheet of very fine wood.
I use a sheet of 0.3 mm in the cigar tube packing, but a wood sheet sold in hobby shop will give the same result. Better not to exceed 0.5 mm thick. The sheet is bonded entirely, then cut the slats directly on the floor.
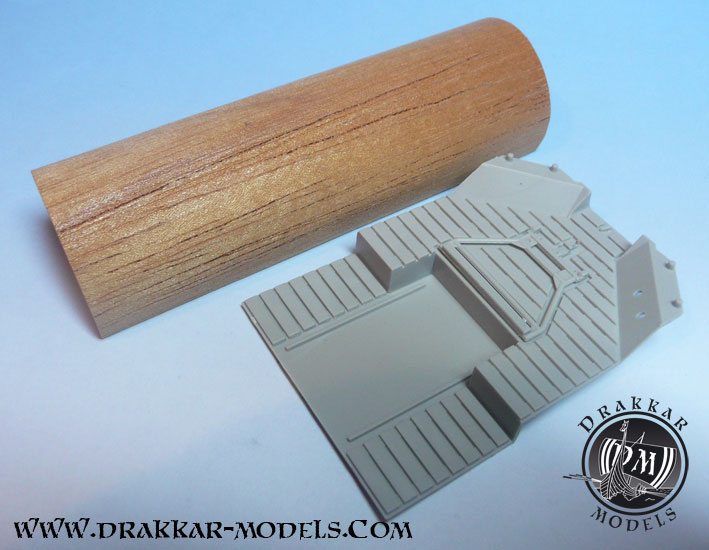
The slats of the fighting compartment are covered with a 0.3 mm thin sheet of wood collected in a tube cigar.
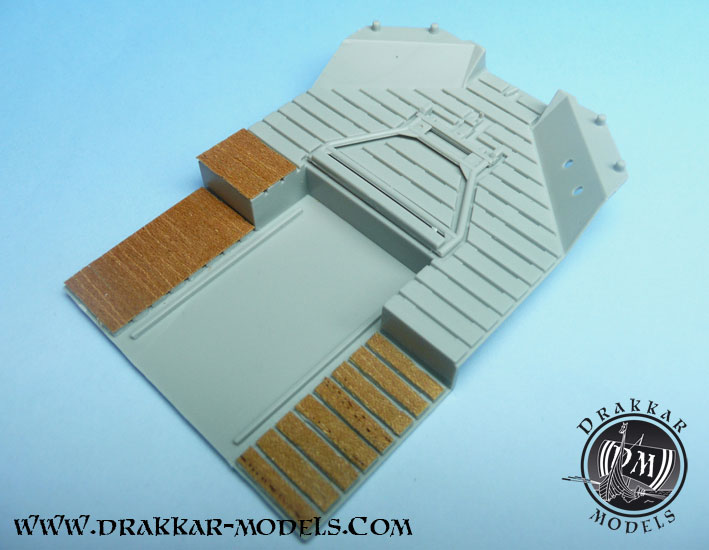
Large strips are glued to the cyanoacrylate before being cut to the shape of the slats.
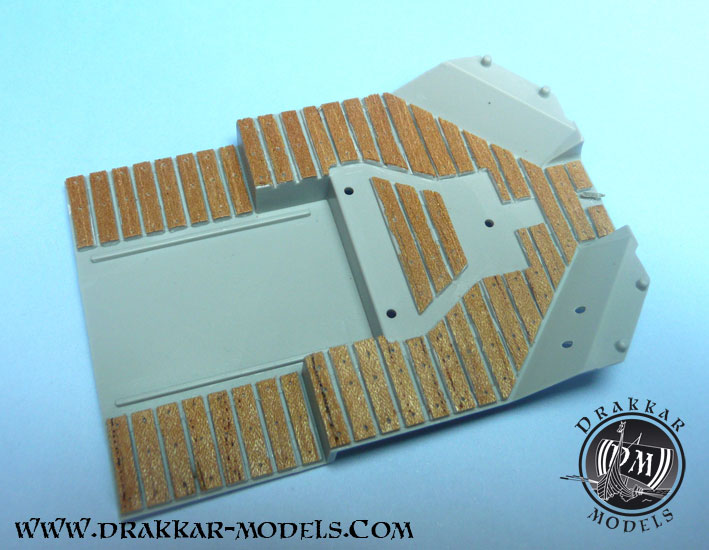
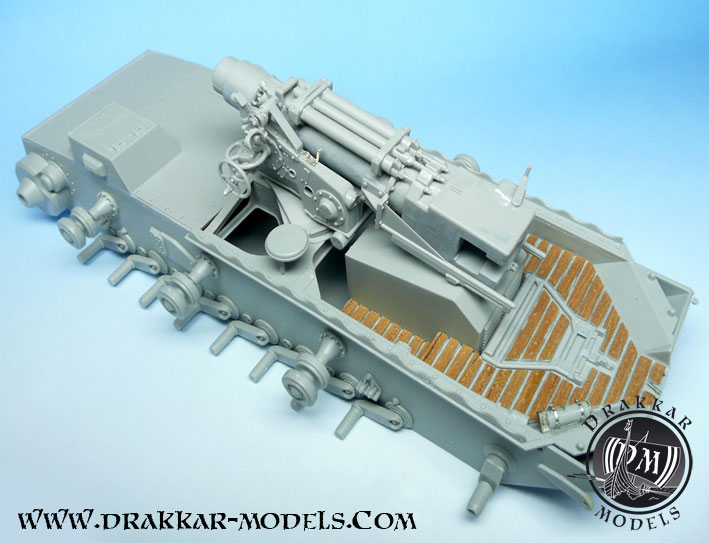
The finished floor can take place in the chassis.
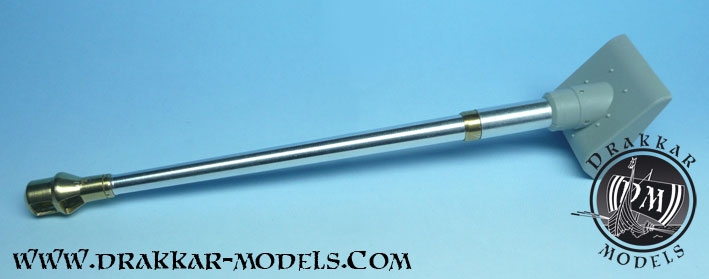
The head, once assembled : the joints are filled with Tamiya Putty gray, slightly diluted with Tamiya Thinner then sanded, like all other elements of the canon, except the tube which be replaced by a Model RB reference.
This gem of the Polish brand, consists of 10 parts, is extremely accurate, its muzzle brake is threaded to be screwed onto the tube, as in the real model !
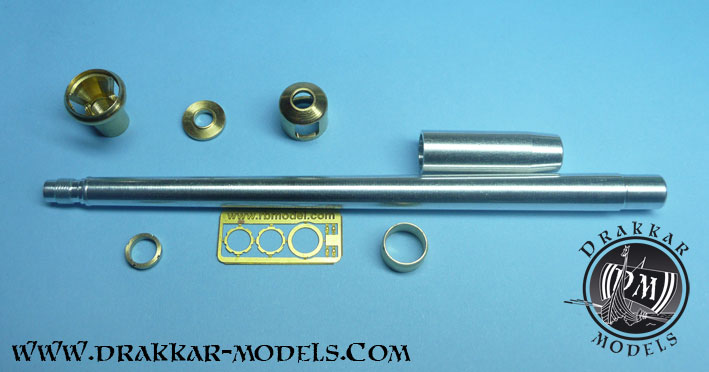
The 10 parts of the RB Model tube. The muzzle brake is screwed onto the tube. A real Work of art !
Wishing represent the yoke in the open position, the movable block, hollow, will clogged with Milliput, like the azimuth adjustment block.
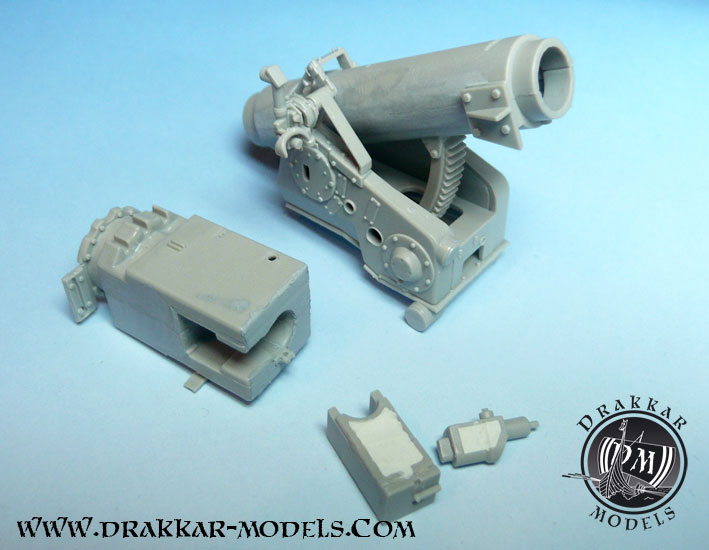
The breechblock of the breech and the azimuth adjustment, hollow, are filled with Milliput. The other parts are filled with Tamiya Putty, then sanded.
The mantle of the barrel will be slightly drilled, to place the 3 photoetched screwheads.
The cannon once mounted. The mantle will be drilled to place the Aber centering screw heads.
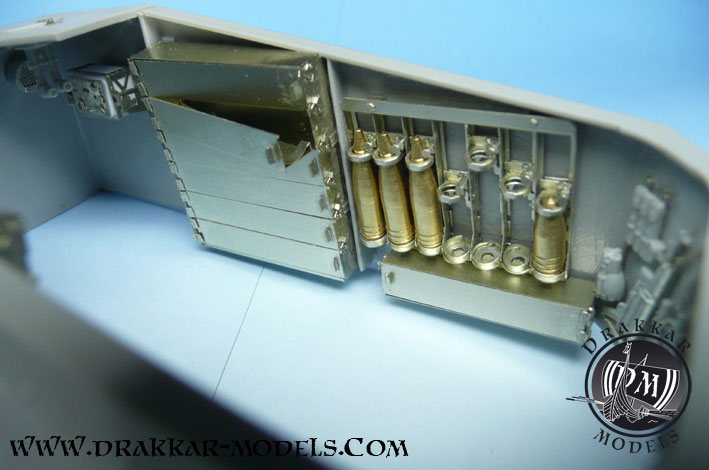
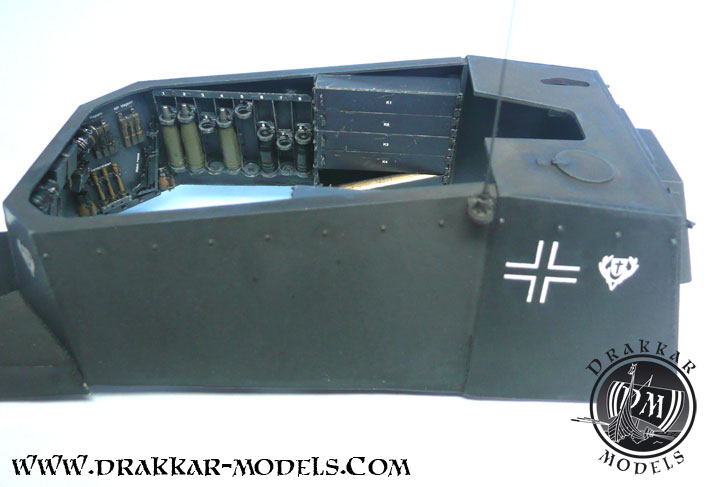
We work now on the fighting compartment and its equipment. Ammunition lockers, which are functional, advantageously replace the plastic ones. Long sessions of folding and assembly will succeed.
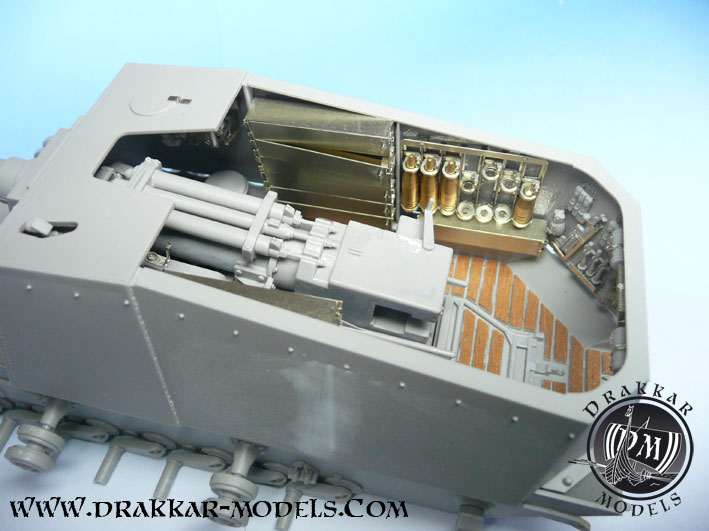
The right side of the interior and the lockers. Radio photoetched is glued around a block of plastic card.
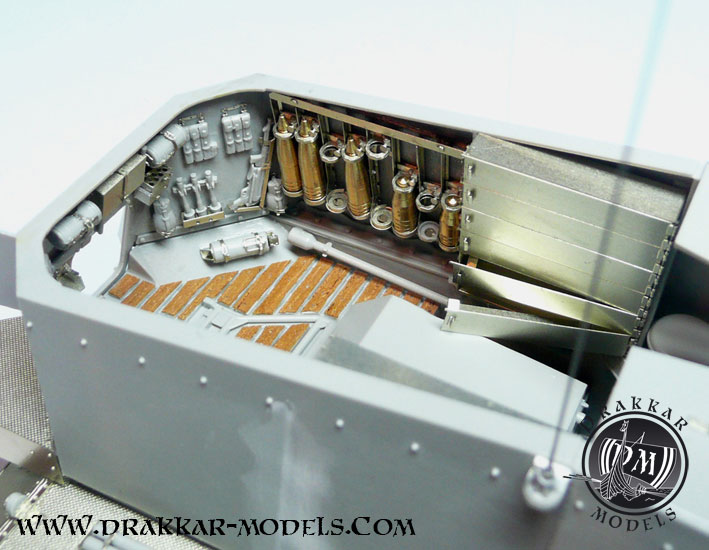
The fighting compartment takes shape. Accessory mounts were make with the kit parts Aber.
For the radio, It will be faster to recreate a small block in plastic card.
The sides are filled with Tamiya Putty, then sanded.
Handweapons and other equipment attached to the walls will be stripped of their plastic fasteners using a scalpel blade, which will be replaced by parts photodécoupées Aber, for a more realistic result.
The exterior of the beast
Fenders are cut from the chassis to be replaced by parts Aber.
These latter are not so complex as they seem. The rear support of the mudguard can be found just above the back roller carrier, preventing the assembly. It may be necessary to cut this photoetch part, or to shorten it.
We use a brass wire of 0.5 mm to form around it the mudguard.
The nuts on the underside of the photoetched mudguard are glued by a small spot of cyano. Unfortunately, they will be much less visible in the end, in the Russian coat of mud.
The inner mudguards have a multitude of bolts attached one by one. Unfortunately most of them disappear under a layer of mud.
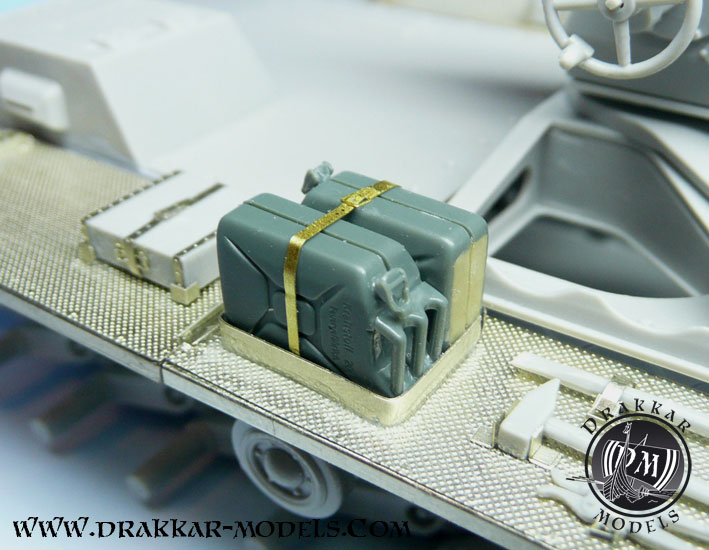
The jerrycans are from a Tamiya kit accessories. The hollow below, too marked, is clogged and the strap is drawn from the batboy.
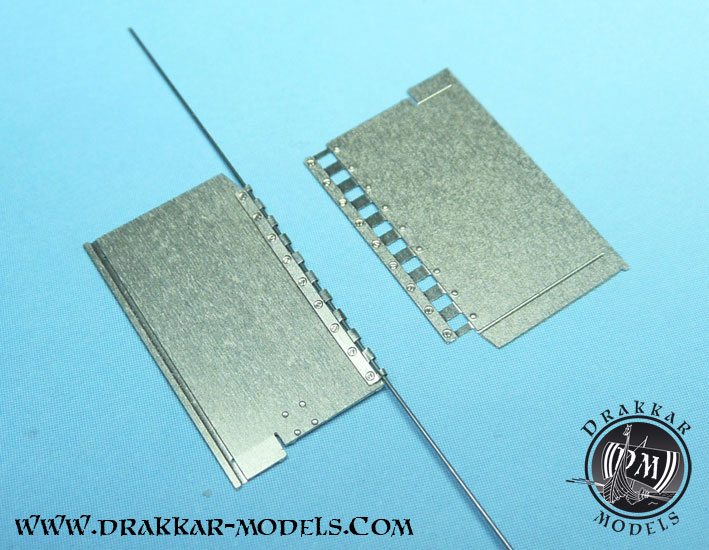
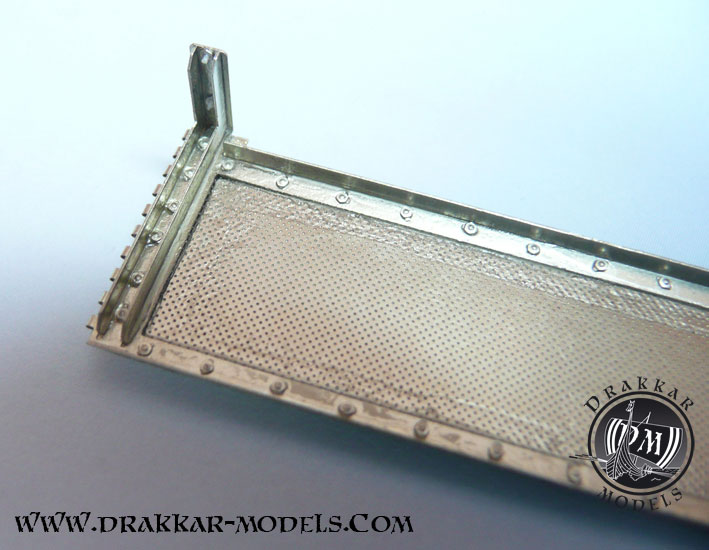
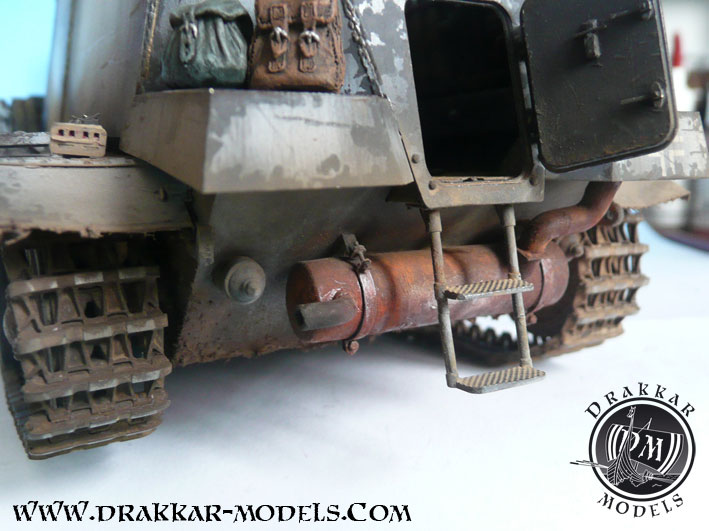
We found a second life to the plastic mudguard, to cover the stairs with surface anti-slip. Suffice it to sand the piece on a sheet of sandpaper, once it has become very thin and semi-transparent, the textured sheet is glued on the steps, then will cutted the surpluses.
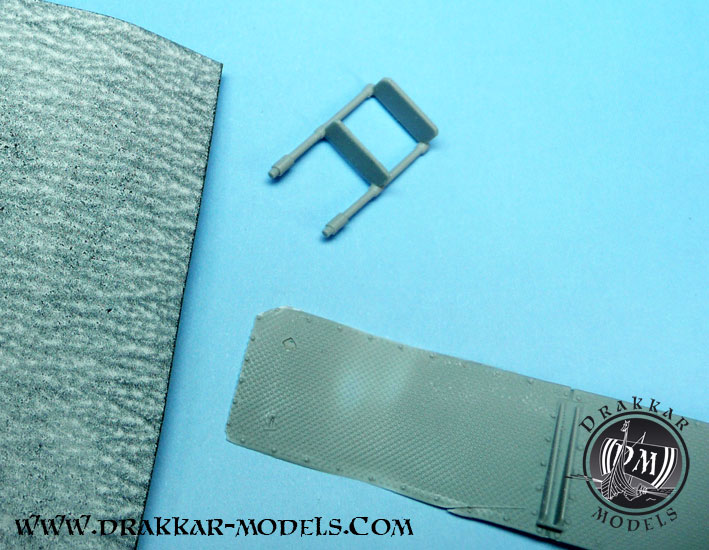
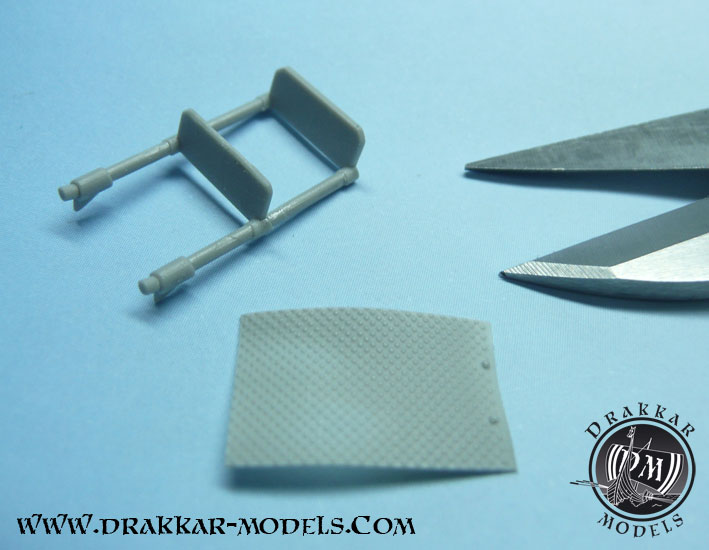
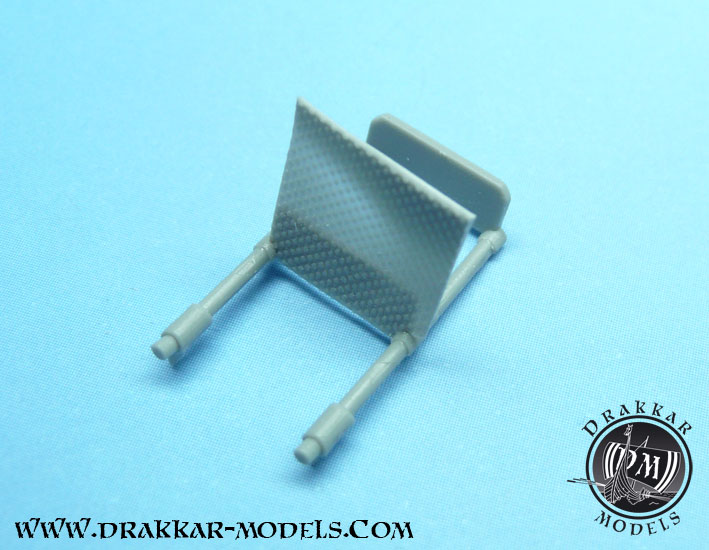
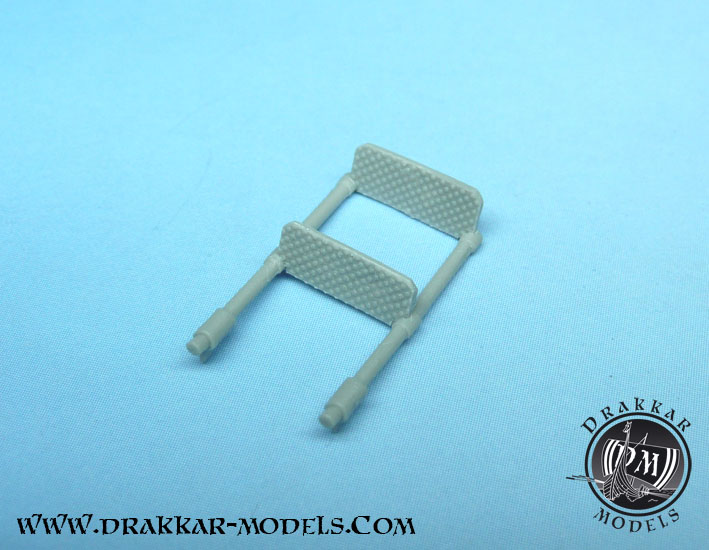
The 4 steps for texture the ladder with the original mudguard.
We replace their fixing plastic parts of the tools with Aber photoetch, after removing them with a scalpel blade sharp.
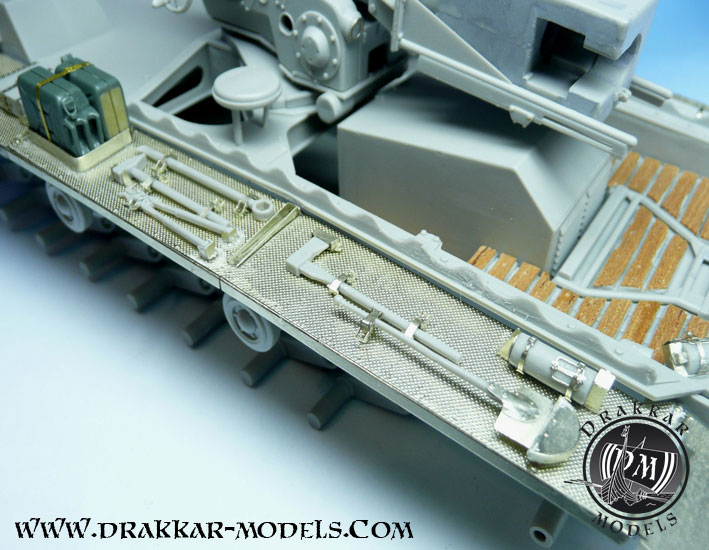
The tools lost their plastic fasteners which will be replaced by the photoetched parts, much more detailed.
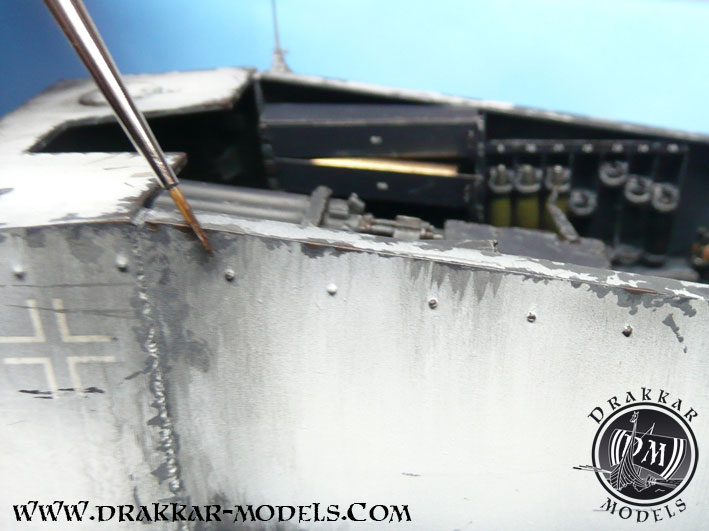
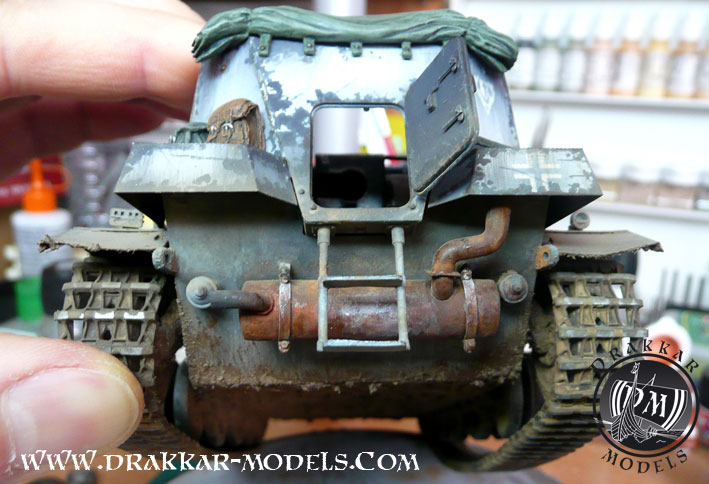
The feeding headlight wire will be added, and a simulate weld wire, missing, is added on the front, using a soldering iron on which we have set a blunted scalpel blade.
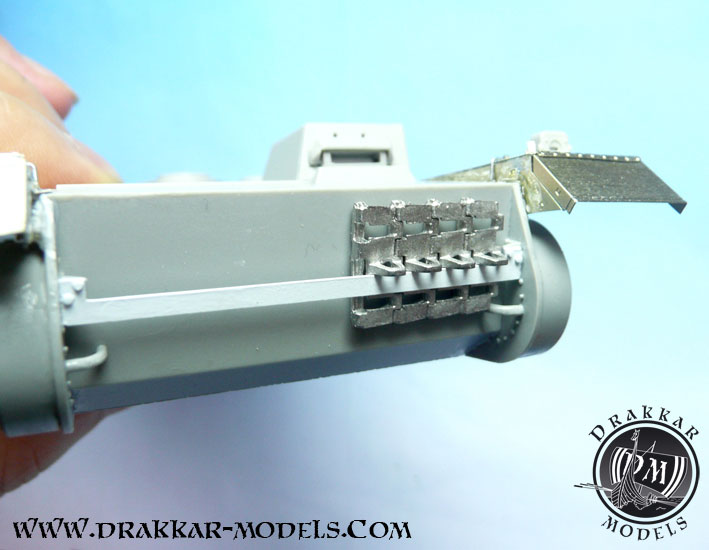
The barre of the track links is made with plastic styrene.

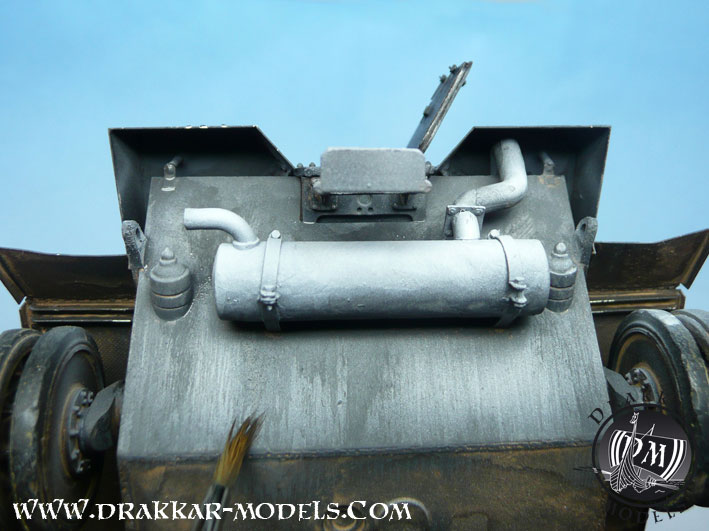
The original locations of the exhaust are clogged and the new bindings Aber refocused.
The muffler will be textured with Tamiya Putty. The tube of the above, too short and visible under the mudguard, is extended using a round rod of plastic sprue.
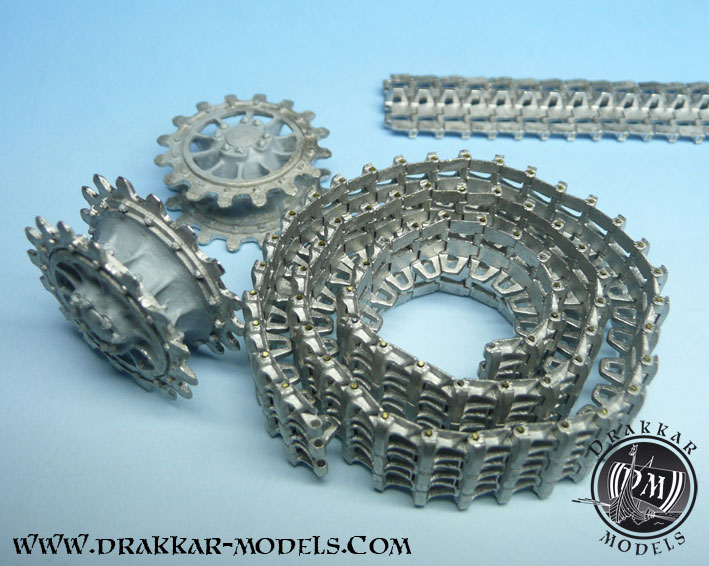
Friulmodel tracks once assembled, and their corresponding sprockets.
Last winter color
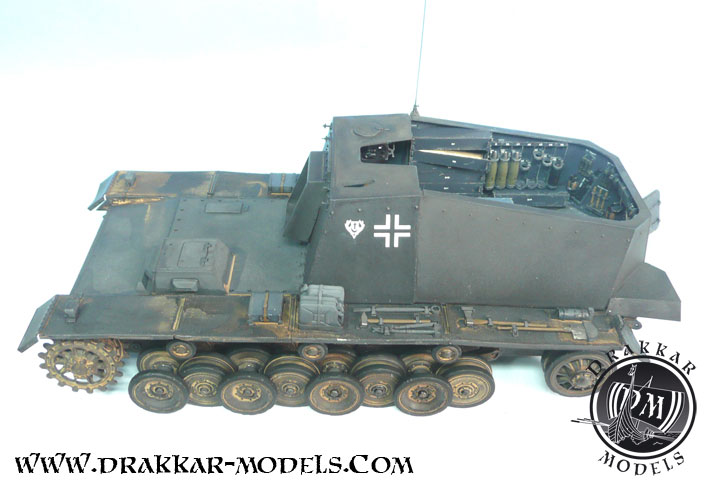
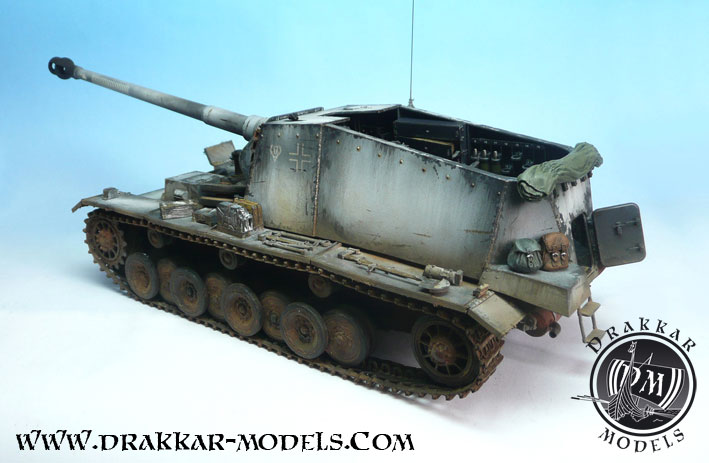
I'm on the observation that the majority of Stürer Emil I could see on exhibition, on the web or in modelling magazines, was simply painted Panzer gray. However, by studying the series of archival photographs, we can realize that they have received a whitewash for the Russian winter. I immediately decided that it would be my version, a whitewash used and dirty, faded by the weather in late winter, as can be seen on a variety of pictures.
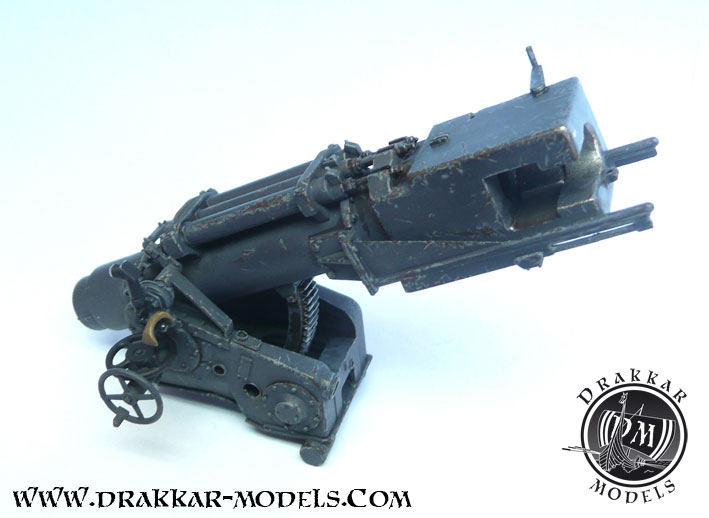
The breech is painted to represent patina and weathering that it have received during fights. The two lenses are reproduced using transparent epoxy glue drops.
The floor is painted in wood tones, then the ends are covered with different shades of gray to weathering them. You can achieve a good result here with the hairspray technique.
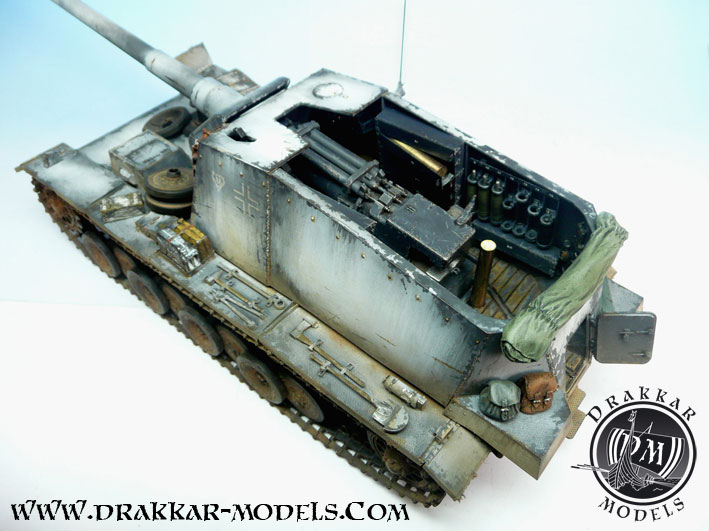
Here, the engine cover has been mounted upside down, and it will be replace, no without difficulty, in the right position.
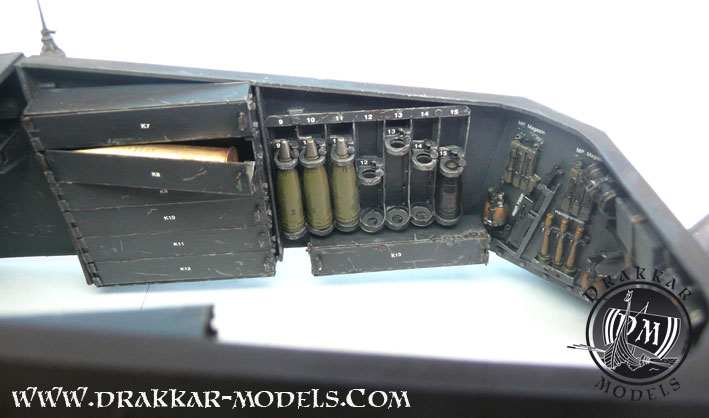
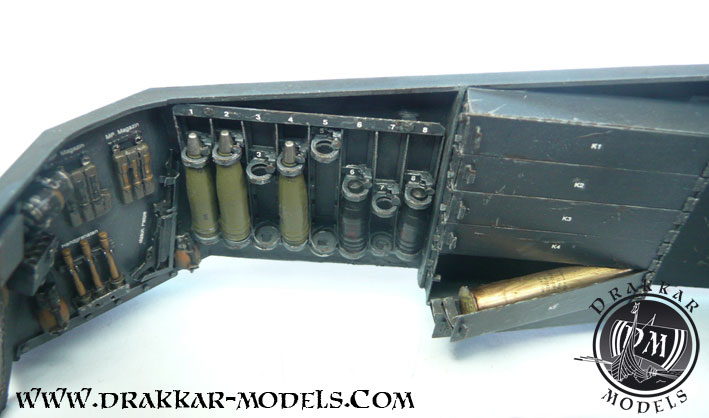
The interior compartments are treated by micro-scratches, decals are applied to each location. We add Aber transfers on ammunition, and Verlinen transfers to name the accessories attached to their permanent place, referring to archival photographs.
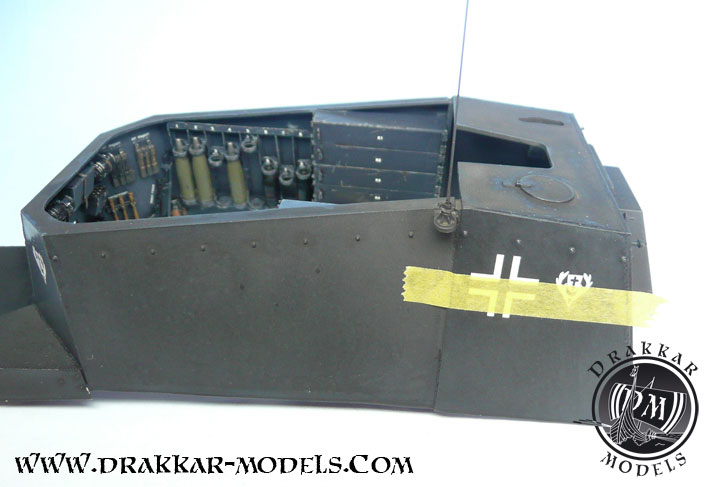
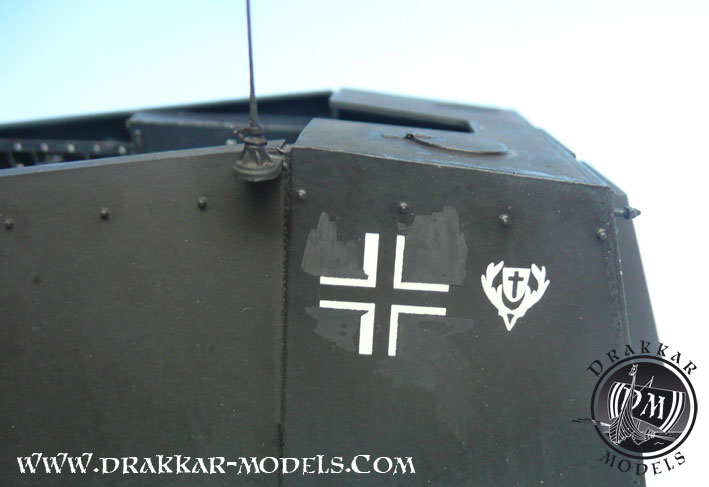
The Balkenkreuz are refined using masking tape, according to old photographs, then a coat of varnish is applied.
The exterior of the motor will be covered Panzer Grey Tamiya XF-63, slightly darkened black XF-1, while the interior of the fighting compartment is painted with Prince August 995 German Gray (Vallejo), more blue satin , to contrast with the dirty and dull exterior.
The fighting compartment is patinated and weathered. We paint all accessories before closing everything.
Decals will not be forgotten, we will add Aber and Verlinden stencils and markings for increased fidelity to the original.
We fill the interior space with paper towels to apply the exterior paint.
Before moving to whitewash, we set the decals. Not wanting to risk tearing the decal in water, the Balkan Kreuz is not cut with a scalpel on his sheet, but painted using masking tape, like seen on photos. Similarly, the victory rings of the barrel are cut, this time with a scalpel, in a rectangular strip shape in accordance with the views of archives.
Then, pure white is sprayed with an airbrush onto the surfaces of the panels, except the gray on their peripheries, and around the decal.
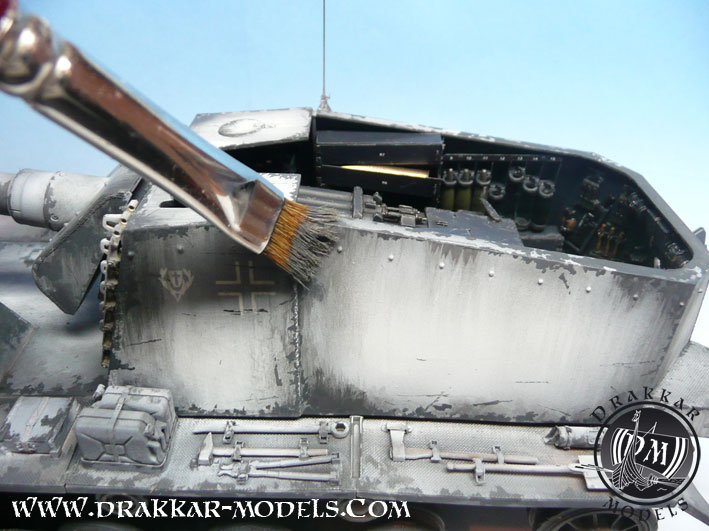
Very light gray streaks are made with many successive passages of very dilute gray.
Very dark brown is applied on the edges exposed, then we rub them with a graphite pencil.
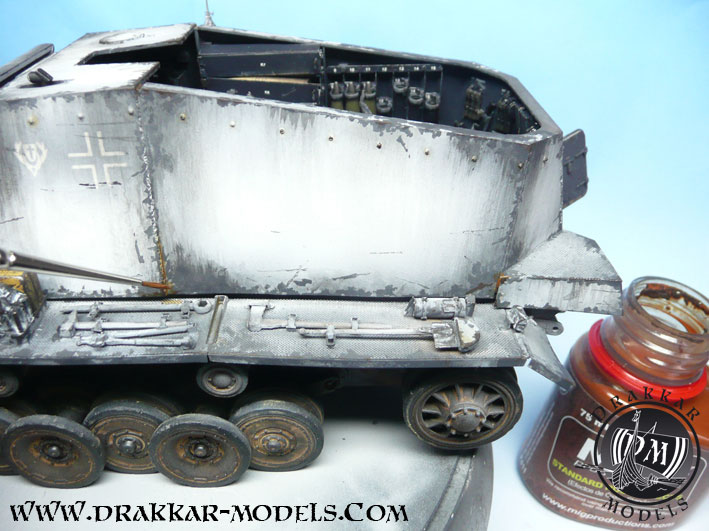
Conversely, some hollow will be marked by a slight rust juice, here the Standart Rust Effects by Mig Production.
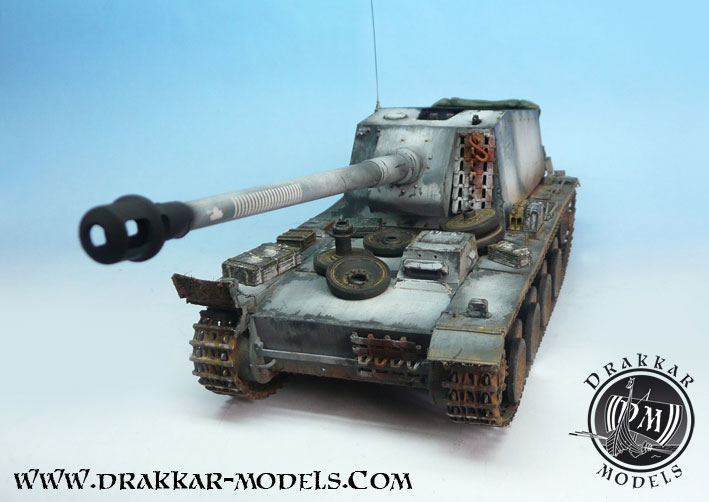
The whitewash will then be treated by brush, passing many successive layers, from top to bottom, gray more or less diluted, with based mix of XF-63 Panzer Gray or added with black XF-1. Scratches are painted in very fine brush, with Panzer Grey, while others are marked with dark brown. Scratches will be enhanced with graphite and / or with a very light wash of rust.
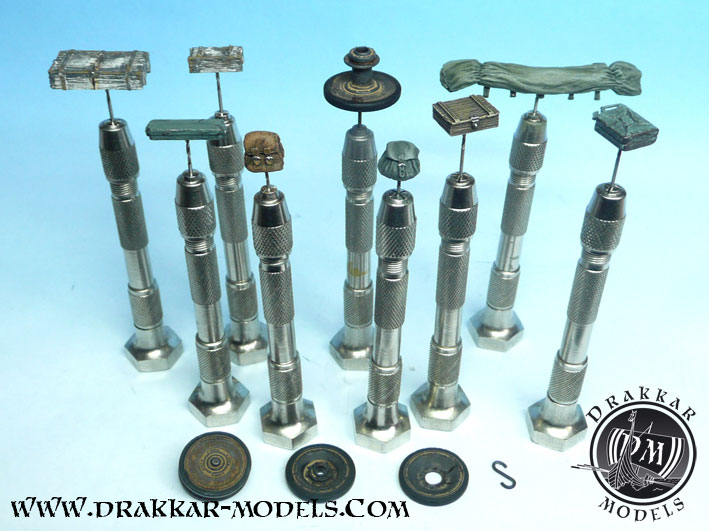
Drakkar-Models Accessories will be painted separately. The tools will be painted directly on the tank.
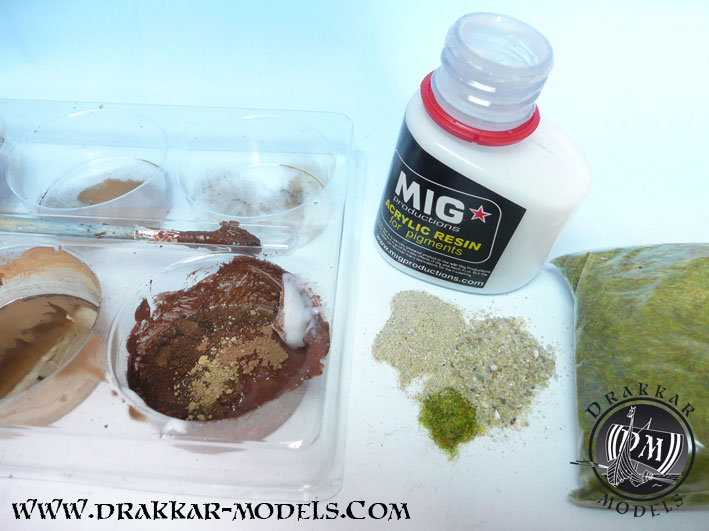
The mud mixture is made up in different shades of Mig Production pigments and resin, sand and static grass.
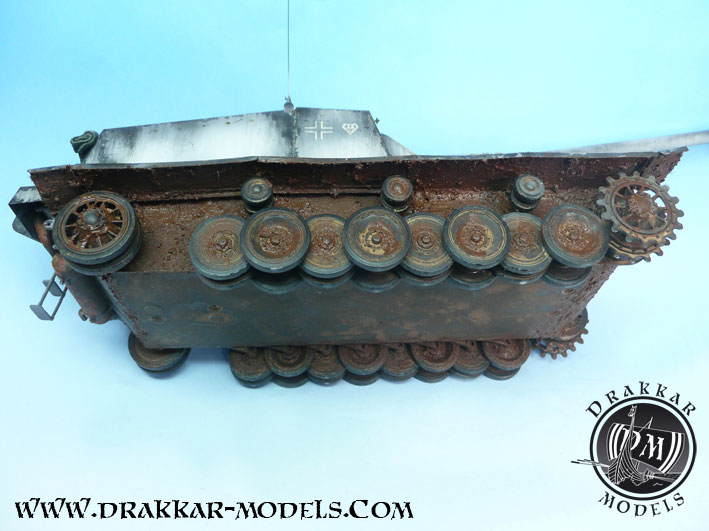
The mud is generously spread over the entire bottom surface.
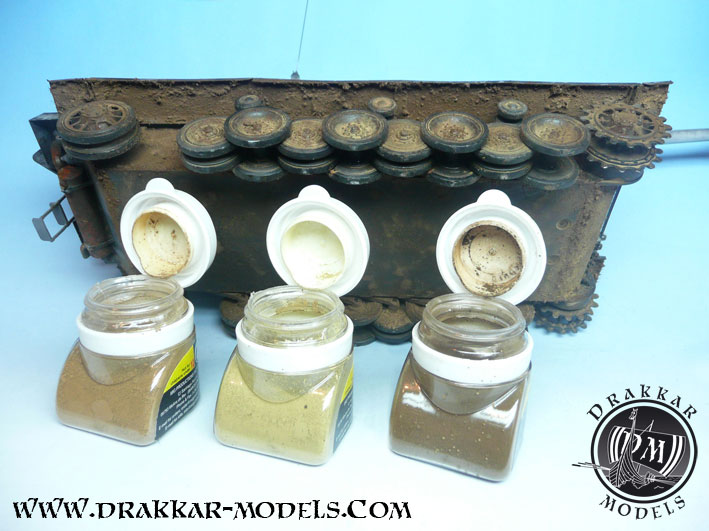
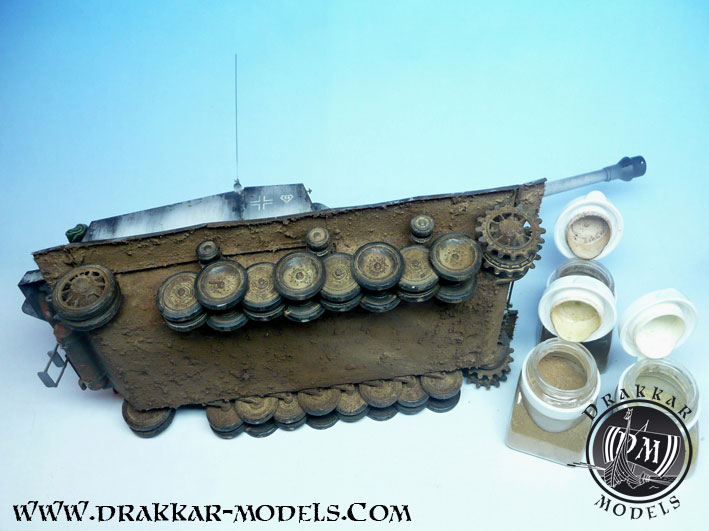
Once dry, we will use different shades of pigments by mixing them more or less between them.
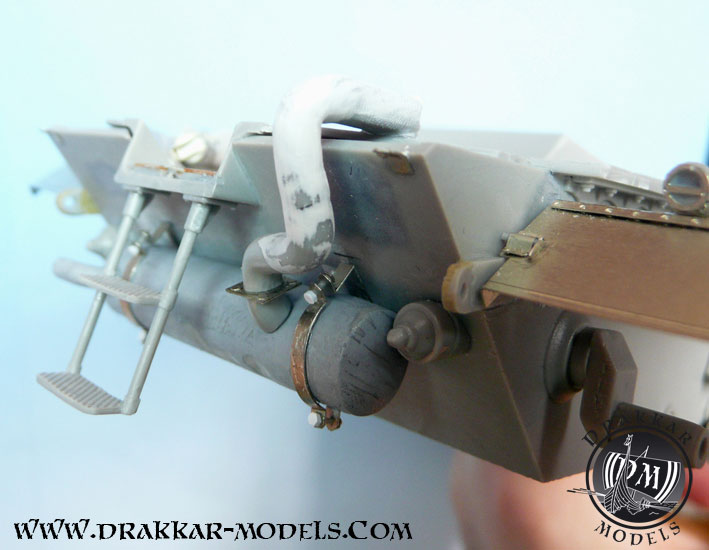
After painting the exhaust in rust color, we will endeavor to reproduce fine traces of whitewash for more realism.
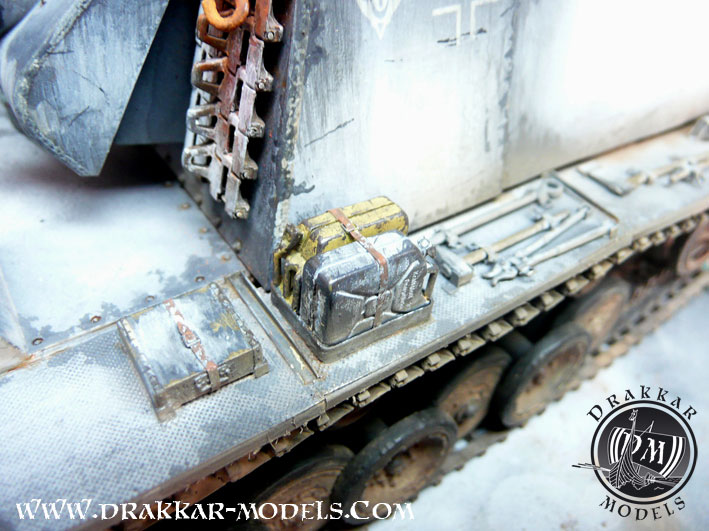
A can of gasoline, survivor of the Afrika Korps, is "micro-painted" and rubbed with a graphite pencil.
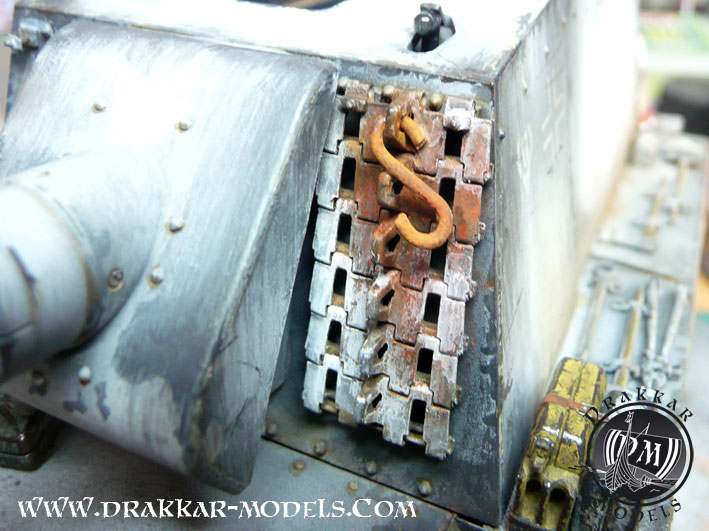
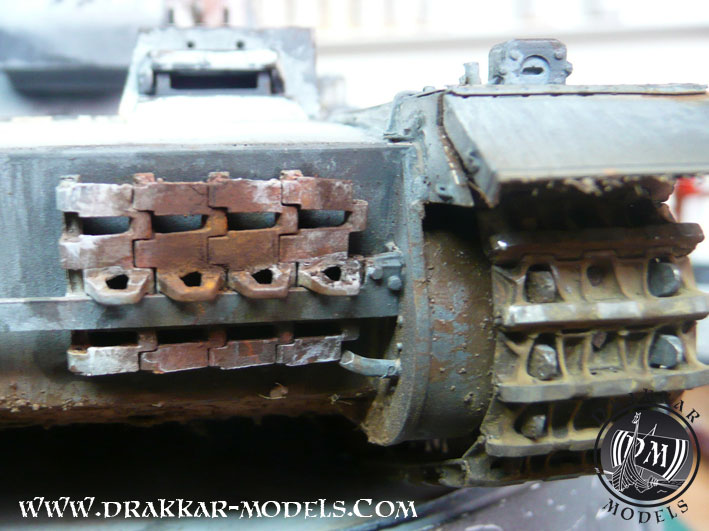
Care should be taken to distinguish the color of the additional track shoes, dirty and rusted, muddy or dusty.

Scratches are added on the sides with a fine brush.
We will cut the Trumpeter decal with victories rings to match with the Moritz archive photos.
The antenna is made of a piano wire of 0.3 mm, which tolerate many manipulations without ending up twisted.
|
|
|
 |
|
